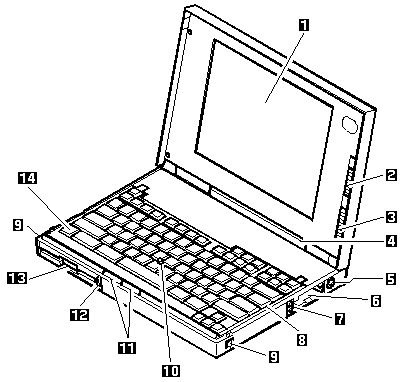
Product Overview #
The 750 and 755 lines represent IBM's flagship multimedia notebooks of the mid-90s, featuring advanced audio and video.
The following tables show a brief overview of the system features.
Models 355x, 360x
| Feature | Description |
|---|---|
| Processor | ° 355x, 360, 360C, 360Cs, 360P SL Enhanced 486SX 33 MHz, solder mounted on the system board ° 360CE, 360CSE, 360PE SL Enhanced 486DX2 50/25 MHz on the system board |
| Bus Architecture | ° AT Bus ° VESA Local Bus for video subsystem |
| Memory (Standard) | 4MB (on the system board) |
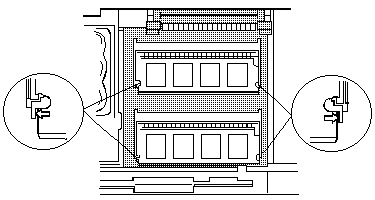
| Memory (Option) | 2, 4, 8, 16MB, Basic IC DRAM card (max. 16 MB) |
| CMOS RAM | 128 Bytes |
| VGA Video | ° 355, 360 - 9.5-inch (diagonally), 64 gray level STN LCD monochrome ° 355Cs, 360Cs, 360CSE, 360P, 360PE - 9.5-inch (diagonally), 256/4096 color, DSTN LCD color ° 355C, 360C, 360CE - 8.4-inch (diagonally), 256/256K color, TFT LCD color |
| Diskette Drive (Removable) | 0.720, 1.2, 1.44MB (3-mode), 3.5-inch |
| Hard Disk Drive (Removable) | ° 355x - 125MB, 2.5-Inch - 250MB, 2.5-Inch ° 360x - 170MB, 2.5-Inch - 340MB, 2.5-Inch |
| Audio Card | ° Standard (360PE) ° Option (other Model 360x) |
| Internal Modem Card | ° Standard (355x) ° Option (360x) |
| PCMCIA | ° 360x - One Type-III or Two Type-II ° 355x - One Type-III or Type-II |
Model 370C
| Feature | Description |
|---|---|
| Processor | Intel® DX4 75MHz on the system board |
| Bus Architecture | ° AT Bus ° VESA Local Bus for video subsystem |
| Memory (Standard) | 4MB (on the system board) |
| Memory (Option) | ° 2, 4, 8, 16MB, Basic IC DRAM card (max. 16 MB) ° 4, 8, 16MB, DIMM card (max. 32MB) ° DIMM card adapter |
| CMOS RAM | 128 Bytes |
| VGA Video | ° 10.4-inch (diagonally), 256/256K colors TFT LCD color |
| Diskette Drive (Removable) | ° 0.720, 1.2, 1.44MB (3-mode), 3.5-inch |
| Hard Disk Drive (Removable) | ° 340MB, 2.5-inch ° 540MB, 2.5-inch ° 810MB, 2.5-Inch |
| Audio Card | Standard in Japan and European countries. |
| PCMCIA | One Type-III or two Type-II |
Model 750x
| Feature | Description |
|---|---|
| Processor | ° 750x - 486SL 33MHz, solder mounted on the system board ° 750Ce - SL Enhanced 486DX2 50MHz on the processor card |
| Bus Architecture | ° AT Bus ° VESA Local Bus for video subsystem (750Ce) |
| Memory (Standard) | 4MB (on the system board) |
| Memory (Maximum) | 2, 4, 8, 16MB, IC DRAM card (max. 20 MB) |
| CMOS RAM | ° 750x - 256 Bytes ° 750Ce - 256 Bytes |
| VGA Video | ° 750 - 9.5-inch (diagonally), 64 gray level STN LCD monochrome ° 750C, 755Ce - 10,4-inch (diagonally), 256 color, TFT LCD color ° 750Cs - 9.5-inch (diagonally), 256 color, STN LCD color ° 750P - 9.5-inch (diagonally), 64 gray level STN LCD monochrome |
| Diskette Drive (Removable) | 0.720, 1.2, 1.44, 2.88MB (4-mode) 3.5-inch |
| Hard Disk Drive (Removable) | ° 170MB, 2.5-inch ° 340MB, 2.5-inch |
| Audio Card | Standard |
| PCMCIA | One Type-III or Two Type-II |
Models 755C, 755Cs
| Feature | Description |
|---|---|
| Processor | ° SL Enhanced 486DX2 50MHz on the system board ° 486DX4 75MHz on the processor card |
| Bus Architecture | ° AT Bus ° VESA Local Bus for video subsystem |
| Memory (Standard) | 4MB (on the system board) |
| Memory (Option) | ° 2, 4, 8, 16MB, IC DRAM card (max. 16 MB) ° 4, 16MB, DIMM card (max. 32 MB) ° DIMM card adapter |
| CMOS RAM | 128 Bytes |
| VGA Video | ° 755C - 10.4-inch (diagonally), 256/256K color, TFT LCD color ° 755Cs - 9.5-inch (diagonally), 256/4096 color, DSTN LCD color |
| Diskette Drive (Removable) | ° 0.720, 1.2, 1.44MB (3-mode), 3.5-inch ° 0.720, 1.2, 1.44, 2.88MB (4-mode), 3.5-inch |
| Hard Disk Drive (Removable) | ° 170MB, 2.5-inch ° 340MB, 2.5-Inch ° 540MB, 2.5-Inch |
| Audio Card | Microphone and headphone jacks with built in microphone |
| PCMCIA | One Type-III or two Type-II |

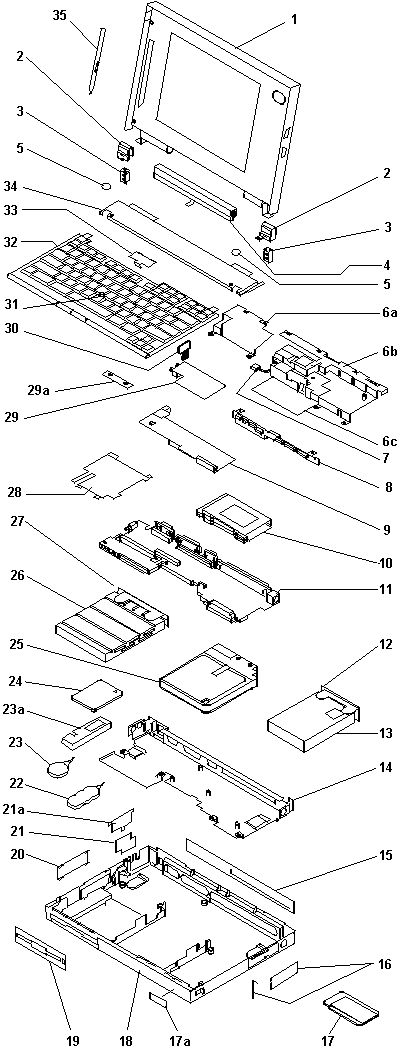
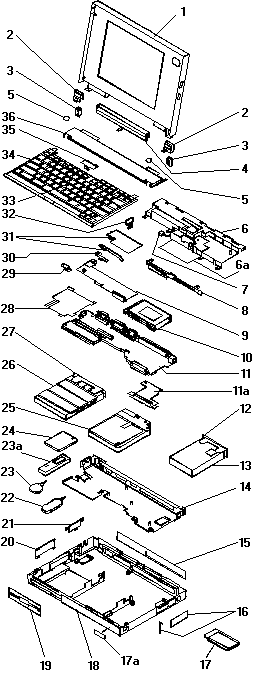
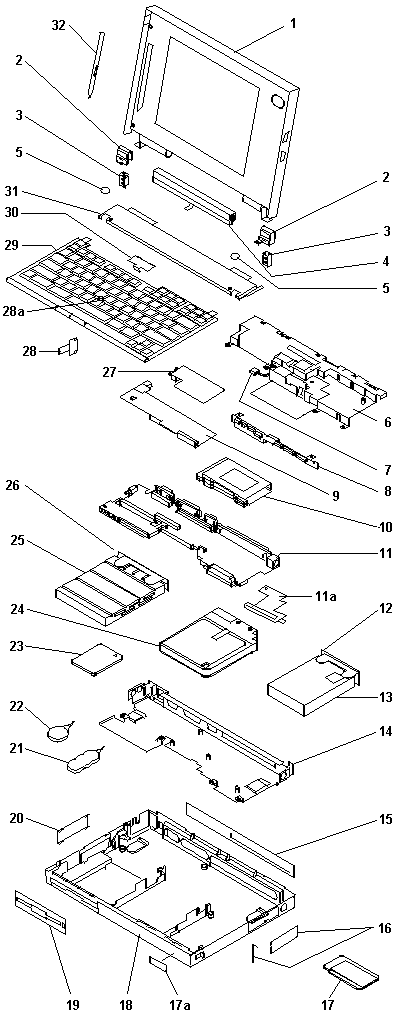
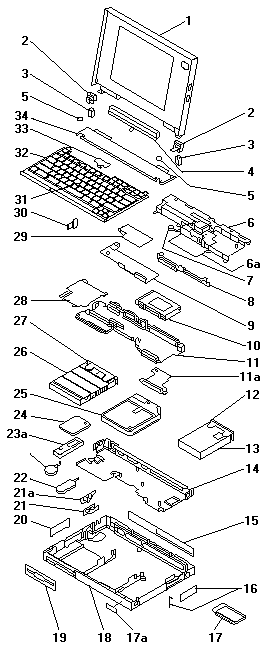
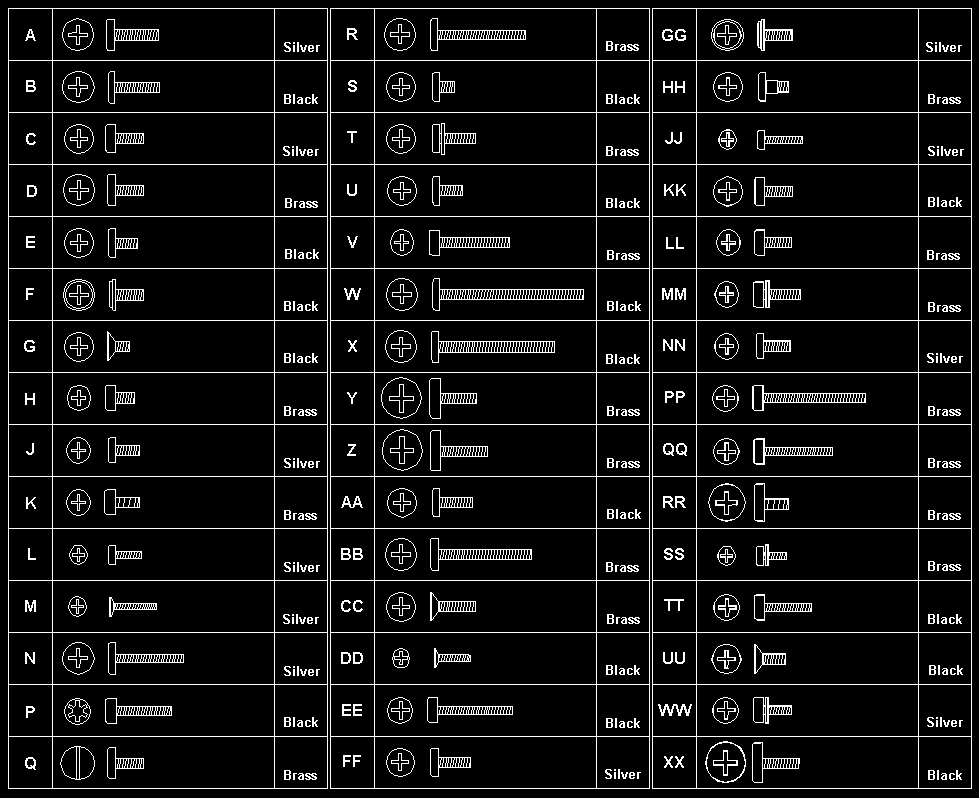
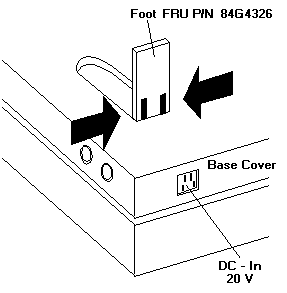
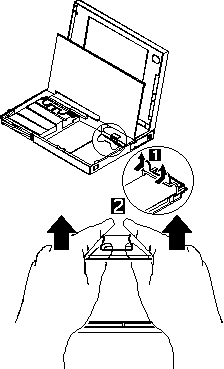
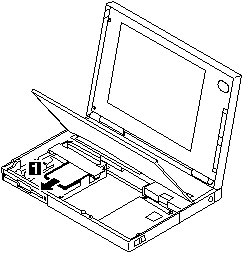
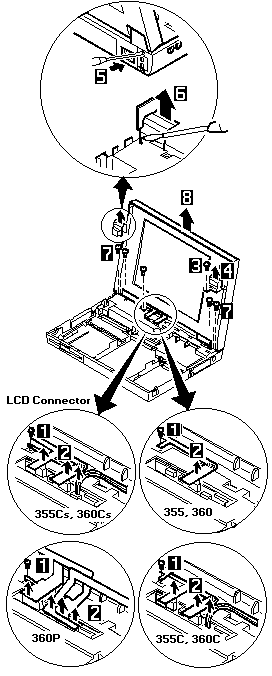
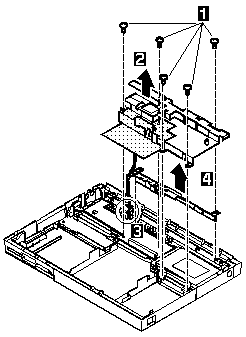
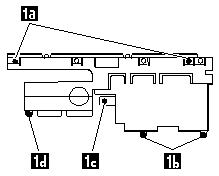
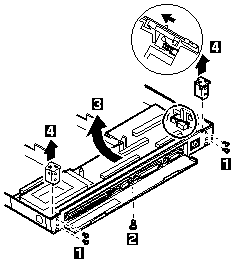
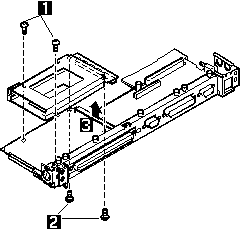
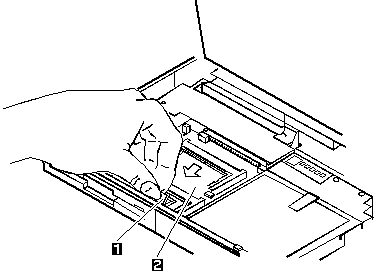
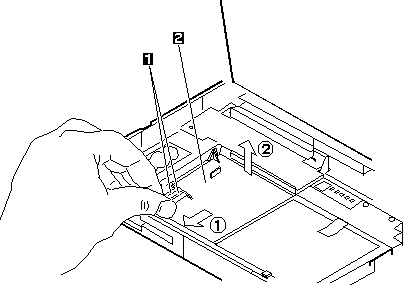
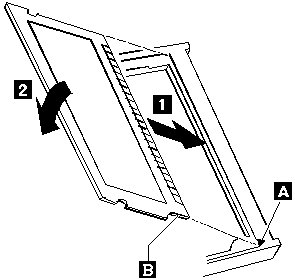
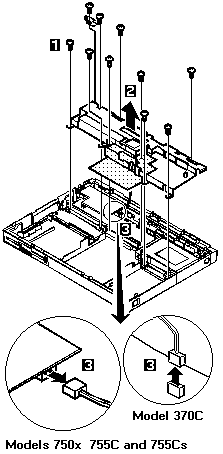
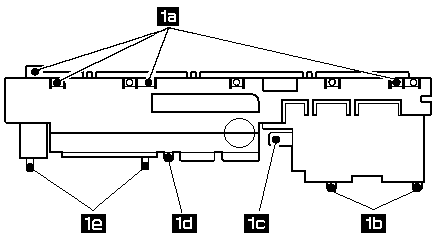
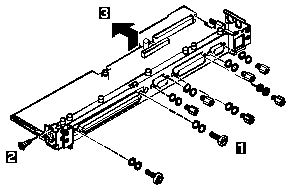
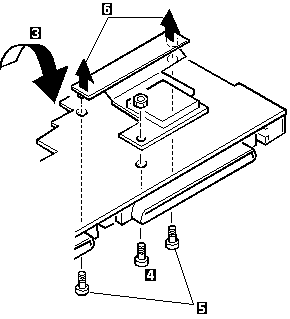
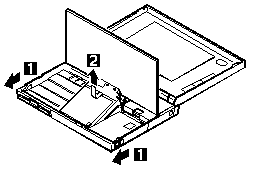
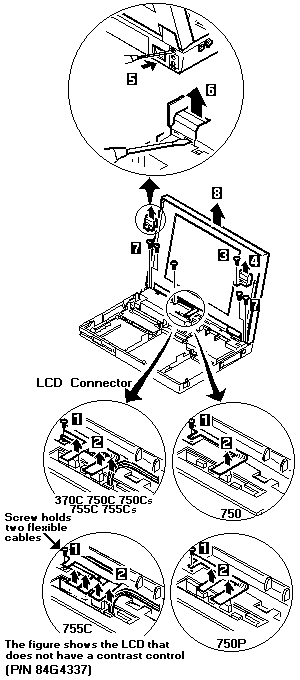
 FRU Removals and Replacements
 electrostatic discharge. Establish personal grounding
 An electrostatic discharge
(ESD) strap must be used
to establish
An electrostatic discharge
(ESD) strap must be used
to establish
 If power for the internal device is turned off
when the TV Tuner is set up,
nothing appears on the LCD display.
Turn on power for the TV Tuner again.
If power for the internal device is turned off
when the TV Tuner is set up,
nothing appears on the LCD display.
Turn on power for the TV Tuner again.
 please
READ - see >>
please
READ - see >>